Quantcast
Channel: Practical Machinist - Largest Manufacturing Technology Forum on the Web - Bridgeport and Hardinge Mills and Lathes
Viewing all 3221 articles
Browse latest View live

Source for mill table lock bolt

$
0
0
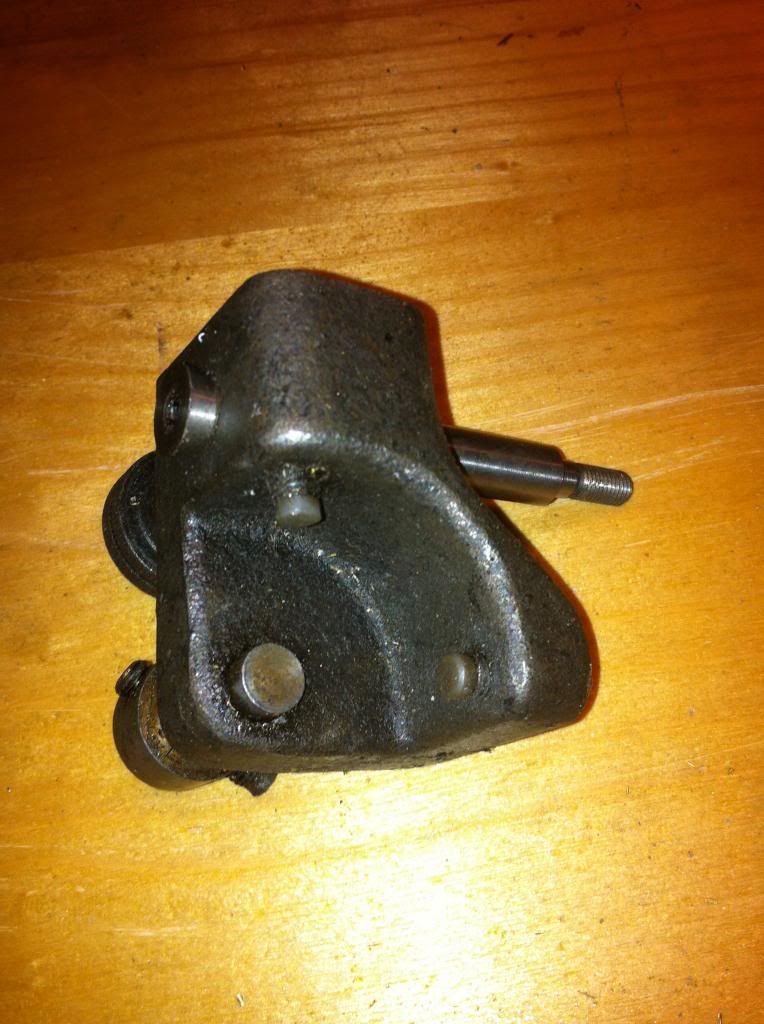
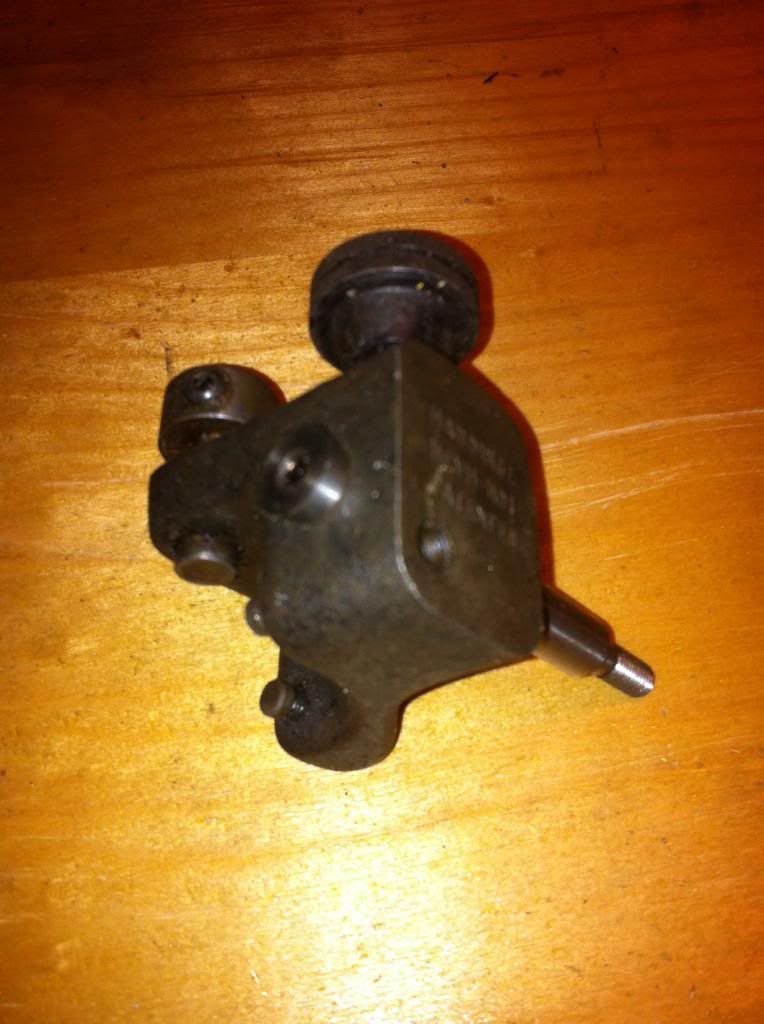
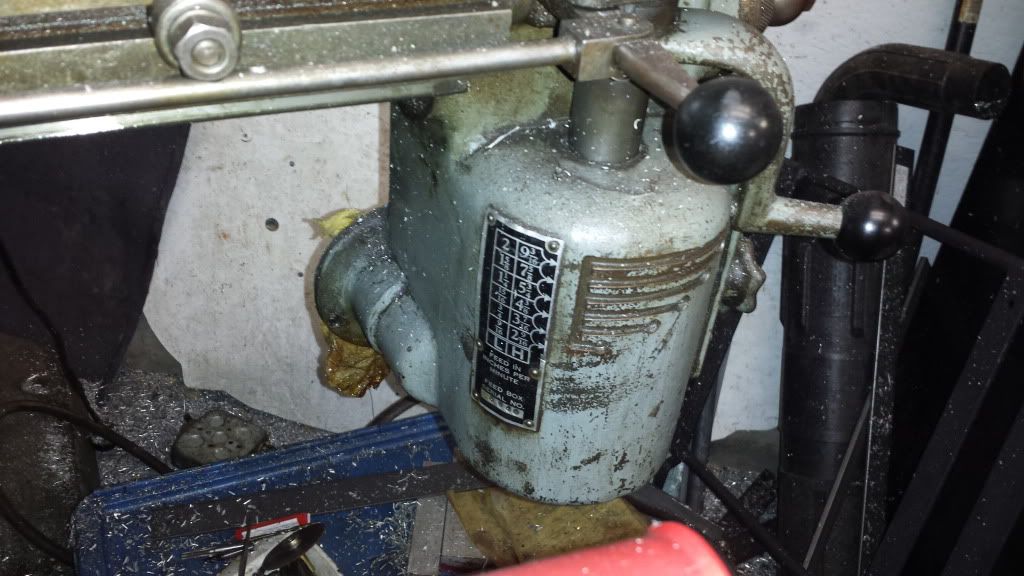
Circled in red is the table lock for a Clausing mill. It's a 3/8" NC bolt with a pivoting handle, and probably costs $$ from Clausing. I have a project where I would like to use something similar in function, but doesn't necessarily need to be so fancy with the pivoting hour glass handle - a pivoting flat bar handle would be fine. I've looked at the usual sources - Grainger, McMaster Carr, etc. but can't find anything, mostly because I'm not sure what to call the type of fastener!

Can anyone point me to a source for a fastener similar to this table lock bolt?
Attached Thumbnails
Click image for larger version. 

Name:	img15.jpg 
Views:	N/A 
Size:	44.8 KB 
ID:	82210  

Help needed identifying HLV H part

$
0
0
Can anyone tell me what this part is?

I found it amongst the bits and pieces that came with a HLVH lathe I got from Craigslist recently:

It is stamped HLV H-1

Bridgeport V2XT help needed

$
0
0
I have a Bridgeport V2XT I aquired last fall have been figuring stuff out to get it going. I believe I need to replace the batteries, been getting CMOS alarm at startup. I believe I have located the battery on the motherboard, small cylinder about 1/2" dia. with leads soldered to either end. I have searched here and other places to get info, but can't figure out where the four AA batteries are located.
If I have read correctly, I need to replace the AA batteries with power on, but will have to power down, probably remove board to solder in new battery there.
I also suspect i will be needing to get data to reinstall afterwards, but that should be obvious I guess once batteries are changed.

Thanks in advance for any help you may have, cncbarn

flipping head over for transport - safety lock?

$
0
0
Well, I'll be bringing home my first Bridgeport one of these days here and I'm wondering how to disengage the lock that keeps the head from rotating past about 30 degrees so I can flip it all the way over?

Thanks

Low voltage work light specs on Bridgeport Mill

$
0
0
What type of bulb am I looking for to change out a low voltage bulb on a original Textron 1985 light. I am thinking a 50 volt ???

Parting out V2XT parts

$
0
0
FMDC board
SAF Board
3 servo driver boards
smaller transformer
and a few other items I have, just don't remember what.

Only thing I am not selling is main transformer, and the Half bridge rectifier that goes with it. I am also still using the monitor cabinet.
Open to offers Machine axis moved before I took it apart. I just didn't have the knowledge to clean out homing switch after runaway Y axis during homing. I retrofitted.

changing out motor on BP V2XT

$
0
0
I have a V2XT and on those things the motor is upside down between the upper head and the turret. This thing has some kind of weirdly sized motor besides the intermittent 3hp thing. I am already driving it with a VFD and output line reactor, but would really like to get a VFD dedicated motor come upgrade time. Problem is I can't get a motor small enough to go in where the original did. Can I mount the motor on there up wards like on a regular Bridgeport ? I'll be doing away with the varidrive system. I wanna use Poly V belt pulleys about a 1.5:1 ratio. I am thinking of going with a Micromax Y1999 3hp motor. 8.5" diameter and 11.1 long.

Anybody have a suggestion for a C frame reducer/adapter? Motor on there now has 145TY-4 frame I plan on putting a 182TC frame motor in there. If I can mount from the top.

Installing a Servo 200 on Bridgeport mill knee...or trying to anyway

$
0
0
Who of those among you have ever installed a Servo feed drive on a Bridgeport?
I am currently installing a Servo 200 on my knee and having problems.
I have installed the extension shaft and held it in place with the 1/8 inch roll pin.
Now the bevel gear goes on and I need to shim it to .015 to .025 end play between the bevel gear and the worm gear.
This is where I am having problems.

I started by using the minimum of shims. This resulted in the shaft locking up tight when the handwheel was installed with the nut tightened down.

I added some more shims. The result of this was the gears made some noise when the shaft was rotated.
The instructions said gear noise means I need more shims.
I have stacked shim by shim with no difference noticed until I got too many shims (I assume) and now the result sounds and feels like the bevel gear and the drive gear are skipping over the top of the teeth.
Can anyone help me on this problem?
Thanks.....
pg
PS: How does one measure rotational clearance of .015 to .025 tooth clearance and obtain this proper shimming?

6F Power feed motor - cord replacement Q's

$
0
0
I had an oil leak and removed the motor to fix it. In the process I discovered that the insulation on one of the wires from the control box to the motor is dry and cracking (the white wire). I'd like to replace the cord. It looks like it's just SJ (SJO?) cord, and probably 14 Ga. The big question is how to connect the new cord to the brush holders. It looks like the wires to the brush holders were crimping in place, not soldered. How do you connect the new wires to the brush holders? Photos below.

Click image for larger version. 

Name:	13 Brush holders in end cap (Large).jpg 
Views:	13 
Size:	97.4 KB 
ID:	82752Click image for larger version. 

Name:	14 Brush holder closeup (Large).jpg 
Views:	14 
Size:	82.9 KB 
ID:	82753Click image for larger version. 

Name:	15 Brushes and screws (Large).jpg 
Views:	13 
Size:	88.7 KB 
ID:	82754Click image for larger version. 

Name:	01 6f feed exterior (Large).jpg 
Views:	13 
Size:	90.1 KB 
ID:	82755Click image for larger version. 

Name:	08 Boehm motor label (Large).jpg 
Views:	12 
Size:	92.9 KB 
ID:	82756
Attached Thumbnails
Click image for larger version. 

Name:	13 Brush holders in end cap (Large).jpg 
Views:	N/A 
Size:	97.4 KB 
ID:	82752   Click image for larger version. 

Name:	14 Brush holder closeup (Large).jpg 
Views:	N/A 
Size:	82.9 KB 
ID:	82753   Click image for larger version. 

Name:	15 Brushes and screws (Large).jpg 
Views:	N/A 
Size:	88.7 KB 
ID:	82754   Click image for larger version. 

Name:	01 6f feed exterior (Large).jpg 
Views:	N/A 
Size:	90.1 KB 
ID:	82755   Click image for larger version. 

Name:	08 Boehm motor label (Large).jpg 
Views:	N/A 
Size:	92.9 KB 
ID:	82756  

Curious about the drawbar "Brake"

$
0
0
Hi everyone, first I'd like to say this has been the most helpful forum during my transition from a Chinese "mill" to a proper full sized knee mill. Just last week, I took possession of a 1980s J-head (Step pully) mill that has taught me a lot in about three days.

The point of my inquiry concerns the brake, I haven't gotten much use out of the mill, but the drawbar brake has suddenly stopped working. I have read that the variable speed mills have something that resembles an automotive brake shoe; but I have founding nothing of relate-able significance concerning that for the step pully.

I would appreciate a nudge in the right direction, I understand I am about to get a crash course in the construction and service of my "new" BP mill.

Thank you for your help.
Ben

bridgeport series 2 backlash

$
0
0
im in the airforce in japan so its difficult instruction on how to adjust the backlash its a 1994 series 2 with .028 backlash if someone would be kind enought to give me some direction on how to adjust it i would greatley appreciate it thank you

HLV-H Collet Closer throwout bearing

$
0
0
The collet closer throwout bearing on my Hardinge HLV-H was very noisy so needed dismantling. Most of the procedure was easy, but the final stage of removing the bearing securing nut required removal of a pair of hex set screws one on top of the other followed by use of a pin face spanner. The nut was very tight and difficult to move.

A large 2ft long face-pin spanner and a hub with 1/8in key way and spanner flats combined with a large amount of force separated the two parts. The problem was that the hardened set screws had been tightened directly onto the thread and damaged it quite severely, but this was readily rectified with a 24tpi hand chaser.

Examination of another collet closer (suspected to be from a Hardinge chucking machine) showed a shop-modification with a groove turned in the thread at the point where the set screw would have borne upon the thread. This seems to have solved the problem.

However, this type of lock arrangement with a hard steel screw bearing directly on a thread seems a bit out of place in a machine of this quality. The manual only shows two screws (8238 & 550303) and I'd have expected a soft metal pad or some such to protect the thread.

Can anyone confirm that there should have been such an arrangement, or is this a known design flaw?

Alan

bridgeport j head worn ways

$
0
0
is it possible to fix them myself

Reconditioning

$
0
0
Im curious if there are any indicators other than paint and new scraping/flaking that would would tip you off when inspecting a machine to determine if it had been "reconditioned"?

Any 110 1ph power feed motors?

$
0
0
I have an older Bridgeport I picked up for a song.
The seller hooked it up to a RPC and I verified it all functioned.
It's been a while and I don't remember if I posted here or not but I have it running off a Hitachi VFD now.

My issue is that the feed motor is 220v 3ph.
Can I hook the motor up to my VFD along with the spindle?
Or should I seek out a replacement motor?
Or can I have this motor rewound for 110 1ph or 220 1ph?
It's a peanut - 1/8hp.
Thanks for any help that can be offered. I cut a lot of rails and it sucks by hand.


Terrible finish when cutting on my Bridgport.

$
0
0
Hi All,

Just bought a 1993 BP with an Anilam 1100 2X control on it. Needed lost of tlc and cleaning. I've trammed the head and tried to take a few cuts. Very rough finish. Checked the ways and Oh Boy did they need adjusting. It has ball screws. I was given some instruction on adjusting the backlash and did that (successfully I believe). So I took my next test cut. Didn't get any better. See the picture.

The top cut was with a 1." - 2 flute carbide insert.
The cut was .025" on the side at a depth of .200"
But to be clear, I was not taking .200" of full stock.
The only load was .025" in X. Cutting in Y.
Finish looks like crap

The bottom cut was .050" wide using a 4 flute 1/2" end mill.
Finish does not look very good at all.


What else should I be looking at?
Open to any ans all suggestions
Attached Thumbnails
Click image for larger version. 

Name:	Mill_Cut.jpg 
Views:	N/A 
Size:	14.8 KB 
ID:	83315  

Bridgeport shaper down force

$
0
0
Does anybody know how much force one of these shapers puts out? Reason I ask is I'm building a small hydraulic ram that will bolt into the back end for use as a shaper and press and I don't want to damage the old girl. Currently thinking 4000 lbs MAX should be safe (?)

My bridgeport is a 3/4hp J head circa 1960s...

Anybody got a copy of the Bridgeport Technical Bullient 7

$
0
0
Hi,

I am trying to get a Series I R2E3 up and running as so far I have had good success, but I am struggling with getting the RS232 working with EZ-Link. I have been reliably informed that the go-to document is the Bridgeport technical service bulletin 7 or TBN-7.

I have searched and searched and cant find it anywhere. Can any one help me out?

Alastair

Hardinge HSL Belt Size?

$
0
0
Anyone know what size the drive belt is for the Hardinge HSL? Thanks.

Hardinge TL/T-10 for sale

$
0
0
Just spotted this on the Columbus Craigslist for anybody looking for a Hardinge lathe.

Hardinge T-10

Harold
Viewing all 3221 articles
Browse latest View live


<script src="https://jsc.adskeeper.com/r/s/rssing.com.1596347.js" async> </script>